Few things can be as disappointing for a photographer as realising that a potentially stunning shot looks pixelated, grainy, or blurry due to low resolution.
Whether you’re printing your images, sharing them online, or simply viewing them on your computer, having a clear, sharp, and high-resolution photo is essential for maintaining the integrity of your work.
Understanding how to avoid low resolution from the moment you take the shot to the final exporting process can drastically improve your photography.
Discover camera settings, shooting techniques, and best practices for exporting photos to ensure you maintain high-quality images, from capture to post-production.
What is Photo Resolution?
Before diving into the practical tips, it’s important to understand what resolution means.
In photography, resolution refers to the number of pixels in an image. The higher the resolution, the more detail the image contains. Images with lower resolution contain fewer pixels, which can lead to a loss of detail and result in blurry or pixelated photos when zoomed in or enlarged.
Resolution is often measured in megapixels (MP). A 12-megapixel camera, for example, captures 12 million pixels in a single image.
This pixel count is a good indicator of how much detail your camera can capture, but it’s not the only factor affecting image quality. Other elements, such as the sensor size and lens quality, also play significant roles.
Camera Settings for Avoiding Low-Resolution Photos
One of the most important steps in avoiding low resolution is ensuring you’re using the optimal settings on your camera when taking the photo. Many factors can contribute to a loss of resolution, from poor focus to incorrect file formats. Here’s what to keep in mind.
1. Use the Highest Available Resolution Setting
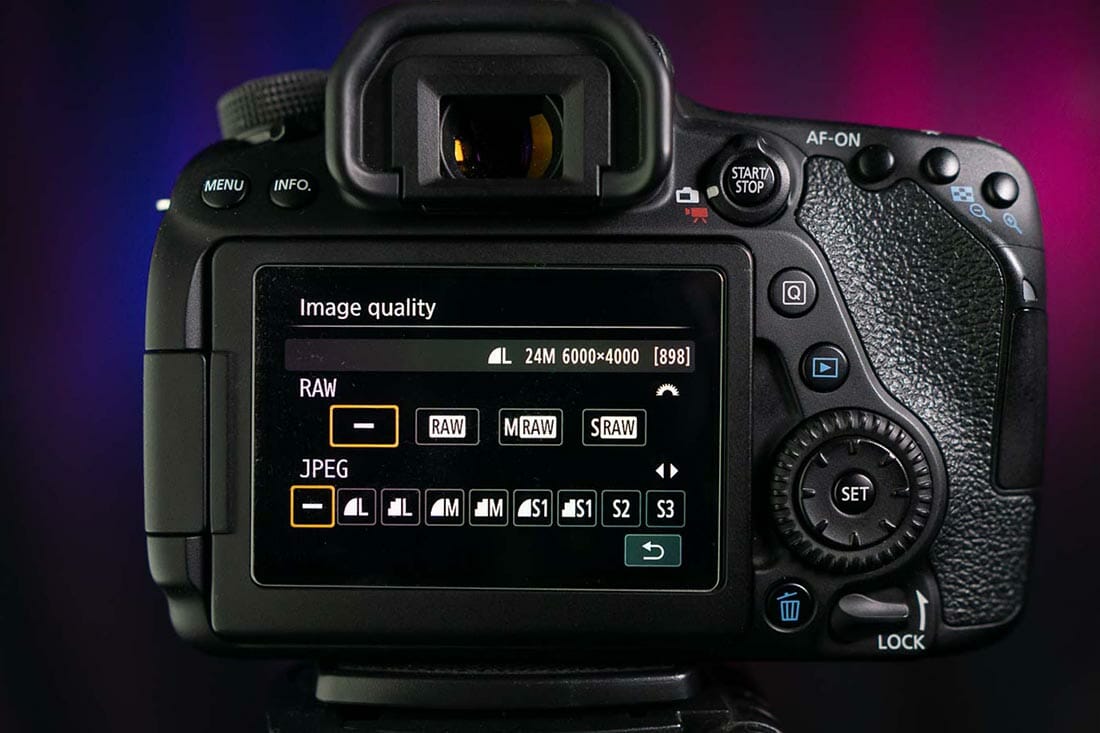
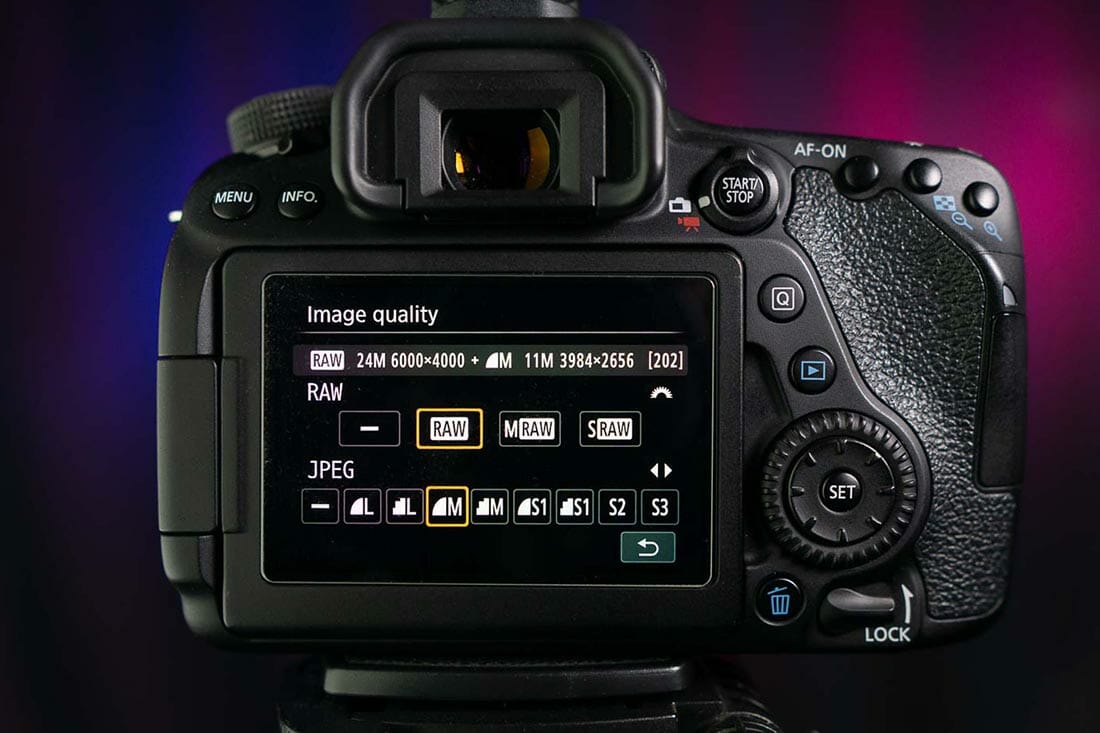
Almost all modern cameras allow you to adjust the resolution at which you capture images. Always shoot at the highest possible resolution available on your camera. This ensures that your image contains the maximum amount of detail possible.
For example, if your camera offers options for shooting in “Small,” “Medium,” or “Large” image sizes, choose “Large.” Additionally, use your camera’s RAW format if possible. RAW files retain more data and give you greater flexibility in post-production, unlike JPEG files which are compressed and lose some quality in the process.
2. Avoid Over-Reliance on Digital Zoom
Many cameras, especially smartphones, offer both optical and digital zoom. Optical zoom uses the camera’s lens to physically magnify the subject without sacrificing quality. However, digital zoom crops the image and enlarges it digitally, which can result in a loss of resolution.
If you’re using a DSLR or mirrorless camera, rely on your lens’s optical zoom capability rather than digital zoom. If you’re using a smartphone, consider moving physically closer to your subject rather than zooming in digitally.
3. Nail the Focus
Out-of-focus images, even if they’re technically high-resolution, can look soft and lacking in detail. Ensuring proper focus is critical. Use autofocus settings like single-point AF for precise control over where your camera focuses. For portrait photography, focus on the eyes; for landscapes, use a broader focus point that covers the entire scene.
If your camera has manual focus capabilities, consider using it for certain shots where autofocus may struggle, such as in low-light or macro photography.
Download our Latest FREE Photography Book
4. Keep ISO Levels Low
While increasing your camera’s ISO setting can help in low-light situations, it can also introduce noise, which reduces image quality. Noise can make an image appear grainy, diminishing sharpness and detail.
Keep your ISO as low as possible—typically between ISO 100 and ISO 400 for the best results in daylight or well-lit environments. If you need to raise the ISO in low-light conditions, try not to exceed ISO 1600 unless necessary.
Using a tripod or external lighting can also help you avoid having to raise the ISO, especially in low-light scenarios.
Editing and Exporting: Maintaining Resolution Quality
Capturing a high-resolution image is just the first step. Editing and exporting can also affect the final quality of your photo. Here’s how to ensure that the editing process doesn’t compromise the resolution.
Avoid Excessive Cropping
Cropping is a common practice in editing, but be cautious not to overdo it. Every time you crop, you reduce the number of pixels in the image, which can lead to lower resolution and detail loss. If cropping is necessary, try to keep it minimal or plan your framing during shooting to avoid needing to crop later.
Use Non-Destructive Editing
When editing your photos, always use software that allows for non-destructive editing. Programs like Adobe Lightroom allow you to make adjustments without permanently altering the original file. This way, you maintain the full resolution of your image, and you can always revert back to the original file if needed.
Working with RAW files during editing also gives you greater flexibility in adjusting exposure, contrast, and sharpness without losing quality. JPEG files, on the other hand, compress and lose data each time they’re saved or edited, making them less ideal for significant editing.
Sharpening and Resolution Adjustment
While sharpening tools can improve the perceived detail of an image, be careful not to over-sharpen, as this can lead to an unnatural or noisy look. Many editing software programs offer a sharpening slider—adjust this gently, and always zoom in to 100% to check how sharpening affects the fine details of your image.
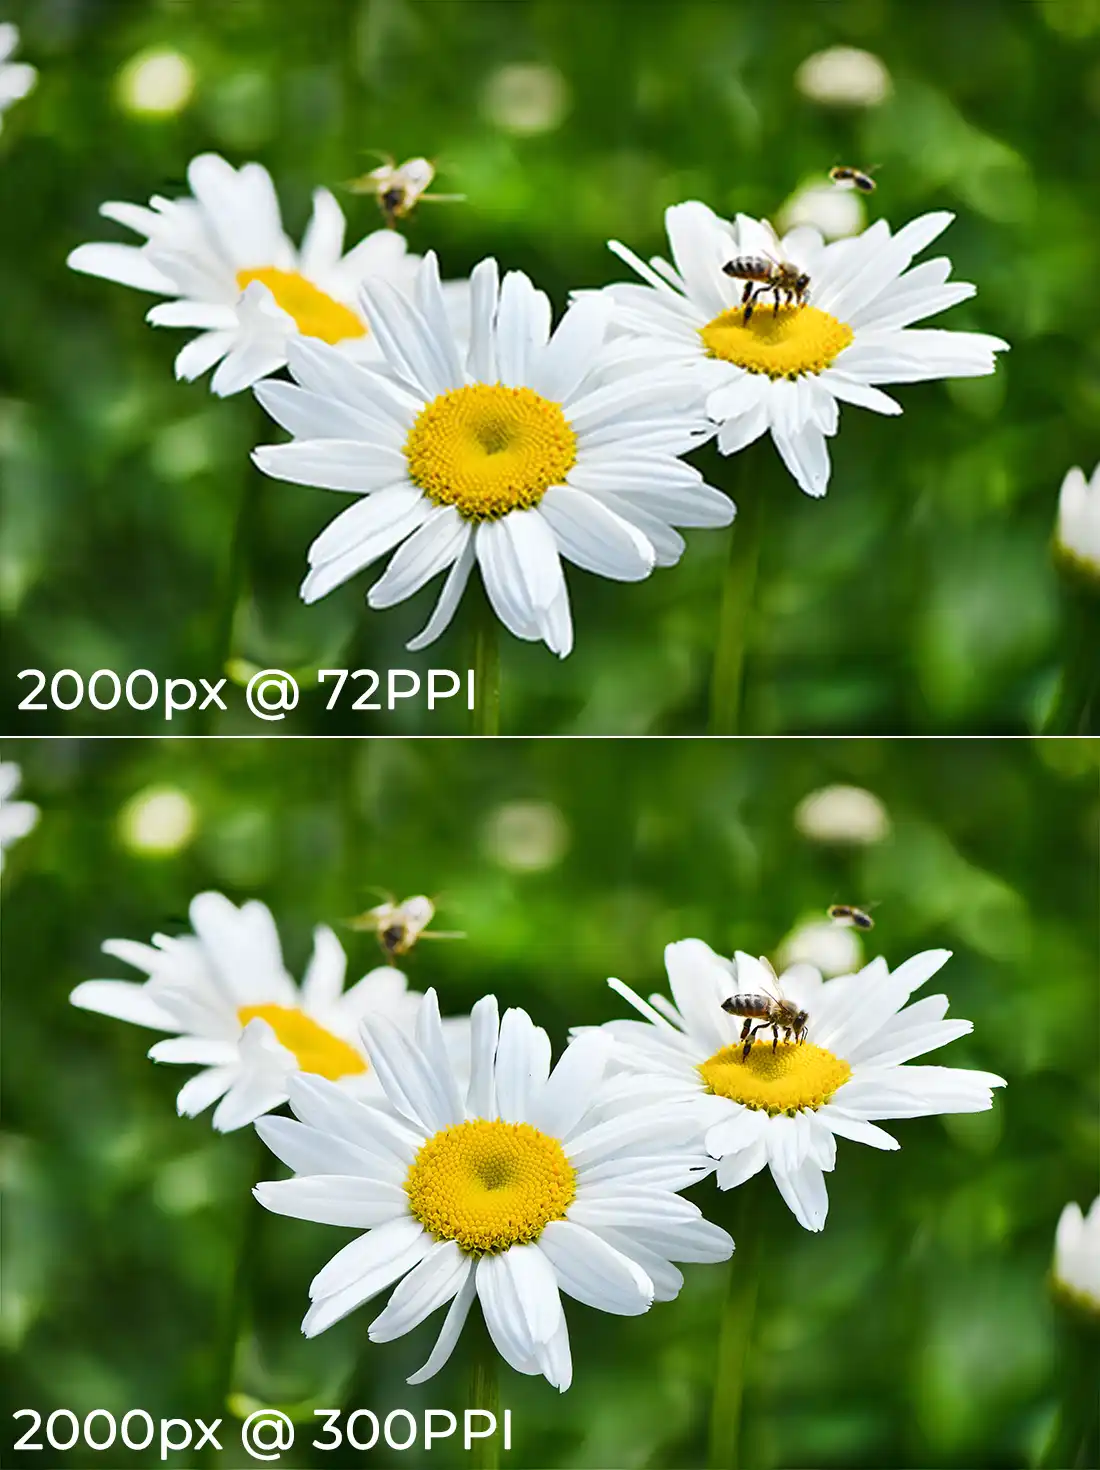
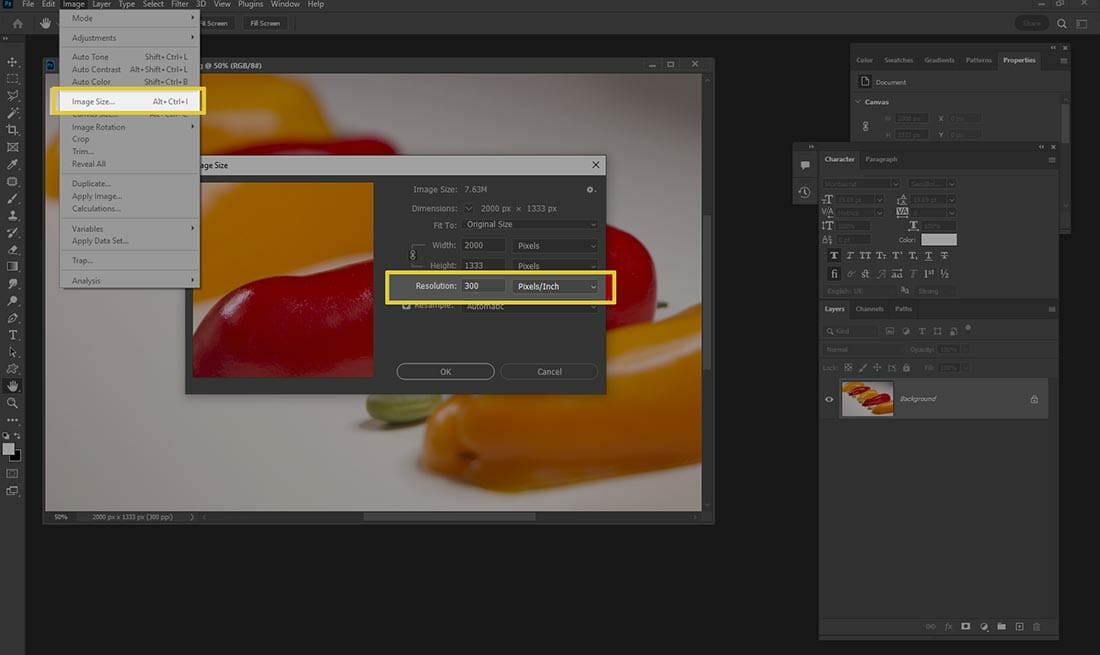
Additionally, some programs allow you to adjust the resolution directly. For example, when resizing an image for a particular use, ensure that the resolution is set to at least 300 DPI (dots per inch) if the image is intended for print. For web use, 72 DPI is generally sufficient, but avoid reducing the image size too much, as this can affect clarity, especially on high-resolution screens.
Exporting Settings for Maximum Quality
When it’s time to export your photo after editing, the settings you choose will have a significant impact on the final image quality.
Here’s what to consider:
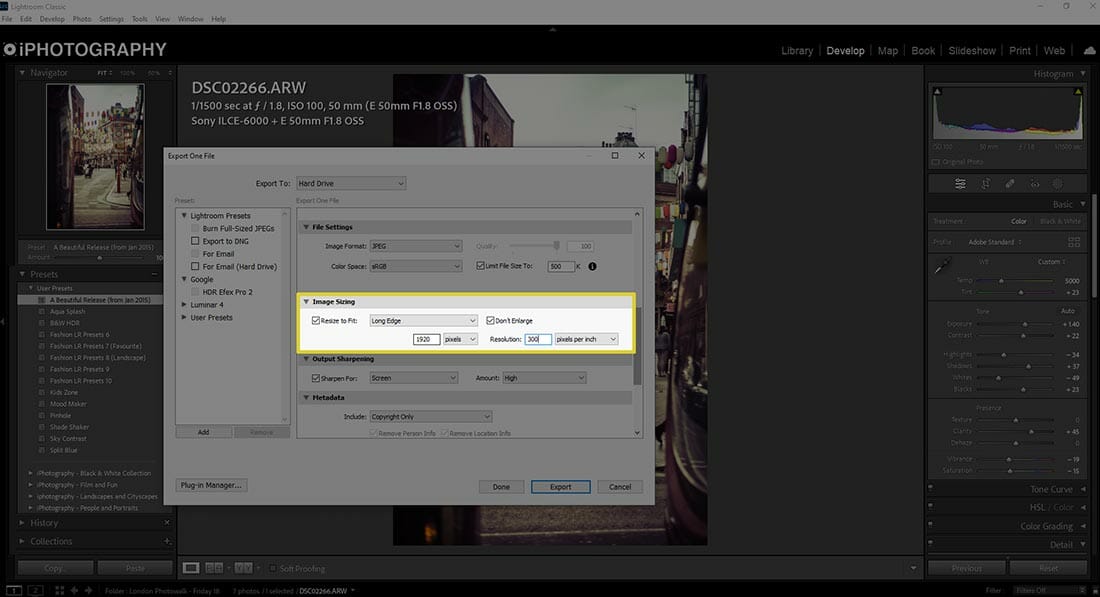
- File Format: Export your images in the appropriate format. For printing or high-quality archiving, export as TIFF or PNG, as these formats retain full resolution and do not compress the file. For web use, JPEG is acceptable, but be sure to export at the highest quality setting possible.
- Image Size: When exporting for the web, aim for the largest practical image size that maintains sharpness while also considering load times. A width of 2000 to 3000 pixels is usually sufficient for most online platforms.
- Quality Slider: When exporting JPEGs, you’ll often encounter a quality slider. Aim for the highest quality setting (usually between 90-100%) to ensure minimal compression and loss of detail.
- Colour Profile: Ensure you export your images in the correct colour profile for their intended use. sRGB is typically used for the web, while AdobeRGB or ProPhotoRGB is better for print as they have wider colour gamuts

Final Thoughts
Avoiding low-resolution photos involves more than just using a high-quality camera.
By understanding the factors that affect image quality—from shooting settings like resolution, ISO, and focus, to the way you edit and export your photos—you can consistently produce sharp, detailed images that stand out, whether they’re displayed online or printed at large sizes.
Staying mindful of these techniques throughout the entire process will help ensure that your images are clear, crisp, and free from resolution issues, allowing your photography to shine.